In this blog, we’ll walk you through the complete guide with step-by-step instructions on “how to combine words and shapes in Cricut Design Space” to create a beautiful, personalized design.
Design Space is a versatile tool for anyone interested in crafting. Whether you’re interested in creating custom home decor, personalized gifts, or unique greeting cards, combining words and shapes can help you bring your vision to life.
Combining words and shapes in Design Space opens up a world of creative possibilities. With this guide, you can easily add text, customize shapes, and create unique designs for any project.
Customizing Shapes and Text in Design Space
Whether you are a pro crafter or a complete beginner, this guide will teach you how to combine words and shapes in Cricut Design Space.
Step 1: Open Design Space
- Start by logging into your Cricut account, opening Design Space, and navigating to the project area.
- Click on the “New Project” button from the homepage to start a fresh design.
Step 2: Insert a Shape
- To add a shape, click the “Shapes” button on the left toolbar.
- After that, you’ll see a variety of basic shapes, such as circles, squares, triangles, and more. Select the shape you’d like to use, and it will appear on the canvas.
- You can also create a custom shape by going to the Image section in the left-hand panel.

Step 3: Resize the Shape
- Resize your image by selecting it and dragging the image corners.
- You can also use the Size panel at the top of the screen to enter specific dimensions.
- If you want to create a symmetrical design, holding the Shift key while resizing will ensure that the proportions stay uniform.
Step 4: Adjust the Shapes’ Position
- Now, drag your shape to position it wherever you want on the canvas.
- You can also use the alignment tools to center it on the screen or align it with other objects in your design.
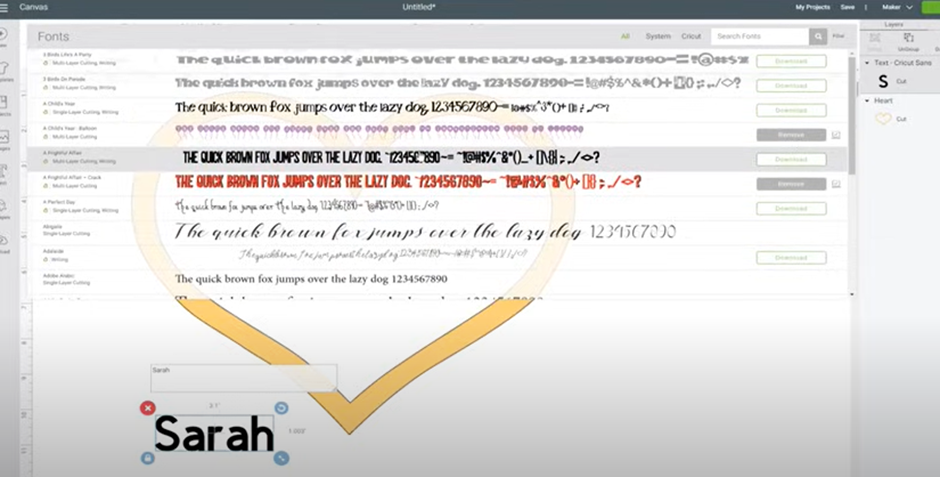
Step 5: Insert Text
- To add text, click the “Text” button on the left toolbar. A text box will appear on your canvas, where you can type your message.
- You can select the font style that suits your project from Cricut’s font library or upload a custom font if you prefer.
Step 6: Adjust the Text’s Size, Spacing
- Select the whole text box and then click on the Ungroup option. Select each letter as this moves each letter to its own individual layer.
- Now, you can easily drag each letter one by one and connect it to the previous ones.
- To select multiple letters, click on one layer in the Layers panel, hold down Ctrl, and click on the other letters to include them.
- When you’ve selected them all, press Group at the top right panel.
- Now, simply click the text box and rotate it using the circular arrow.

- Again, ungroup the text and adjust your text neatly with the shape without leaving any space.
Step 7: Modify the Shape
Use the edit tools in the Design Space software to modify shapes. For example, resize, rotate, weld, or slice them to create unique designs.
- Use the “Weld” tool to merge multiple shapes into one continuous object. This will merge them into a single, merged shape, but itmay also fill in small holes in the letters. If welding fills in unwanted areas, try undoing and welding again with larger text.
- Get your letters to layer, right-click, and duplicate. Drag one on top of the other, as we want to make sure these are exactly one on top of the other, and align them to the center.
- Click on the layers you want to slice, ensure the heart and text layers are selected, and then press Slice at the bottom. It allows you to cut shapes into parts, creating custom cut-outs.
Step 8: Delete Unwanted Layers
- Now, you’ve got all these new layers called Slice results. We don’t want the ones that are the same color as the text, so we can right-click and delete them.

- We want the bottom one, which shows you the outline of the heart. However, there’s a gap where your word was, and now, if you turn on your other word layer by clicking the eye, you can see that you’ve still got all the details there.
- To hide the bits of yellow between the word and the letters, click on the heart and press Contour at the bottom right.
- Zoom in a bit to make it easier. Then you’ll have all of these sections from where we sliced it, and you can click on those little individual pieces to hide them.
- Now, you will see you’ve eliminated them, forming a nice line between the heart and your word.
The last thing to do is click on the heart and change the color to match your text. Your design is now nearly ready to cut.
Step 9: Align, Weld, and Attach
- Use the alignment tools to center your text and shapes. Once everything is positioned correctly, select all the elements and click “Attach” to lock them in place.
- Use the “Weld” tool to combine the shapes and text into a unified design if needed.
Step 10: Click on Make It
After combining, welding, or attaching your design, click “Make It” to send the finalized design to your crafting machine.
Congrats! You have now learned the process of combining words and shapes in Cricut Design Space, unlocking endless creative possibilities for your DIY projects.
Troubleshooting Common Issues When Combining Words and Shapes
Design Space is user-friendly, but users might face occasional challenges. Here are some common issues and their solutions to enhance your experience.
Issue 1: Overlapping Shapes and Text
If your text and shapes overlap unexpectedly, use the “Position” tool to adjust their placement. The “Align” function can also help ensure everything is spaced evenly.
Issue 2: Attachment vs Grouping
Make sure images are attached to the text instead of grouped. If they are grouped, detach them first to make adjustments.
Issue 3: Welding Overlapping Areas
Apply the Weld function to merge overlapping shapes into one layer, which is particularly useful when combining text inside a shape.
Frequently Asked Questions (FAQs)
How do I put words into a shape for my project?
Follow the instructions given below to put words into a shape:
- Open Cricut Design Space and type your desired text.
- After that, insert your desired shape.
- Ungroup the text from the Layers tab.
- Resize and drag the text to fit neatly inside the shape.
- Use multiple text boxes for better control.
- Click the Slice button, move the parts you want to keep away from the unwanted parts, and then delete the unwanted parts to complete the design.
- If you’re cutting both the shape and the text from one material. Weld them together to create one solid cut.
- If you’re drawing the text inside a cut shape, select both and attach instead of Weld.
What is the difference between Weld and Flatten on Cricut?
In Cricut Design Space, “Weld” merges multiple shapes into a single, one-color shape. It essentially “melts” the shapes together, removing any overlapping cut lines and creating a new, single-layer object. Any design or colors on the individual shapes are lost, and the welded shape will be a single color.
Meanwhile, “Flatten” prepares layers for print and cut, keeping each layer’s original color and design. This ensures that when your machine prints, it will recognize each layer’s individual color and then cut the entire design.
How to Contour in Cricut Design Space?
To contour in Design Space, follow these steps:
- Choose the image or layer you want to contour in Cricut Design Space.
- In the Layers panel, locate and click the “Contour” button.
- The Contour window will display all the individual cut lines of the selected layer.
- Click on a cut line to toggle its visibility. If it’s currently visible, it will be hidden; if it’s currently hidden, it will be revealed.
- Once you’ve hidden the desired cut lines, click “Done.”